Name your wiki and create its first namespace. This is a one-time administrator task after Install HMD; people joining an existing wiki can start with Your First Wiki.
A namespace is a top-level area of the wiki, such as notes or team. Start with one and add more later.
Set up the wiki
-
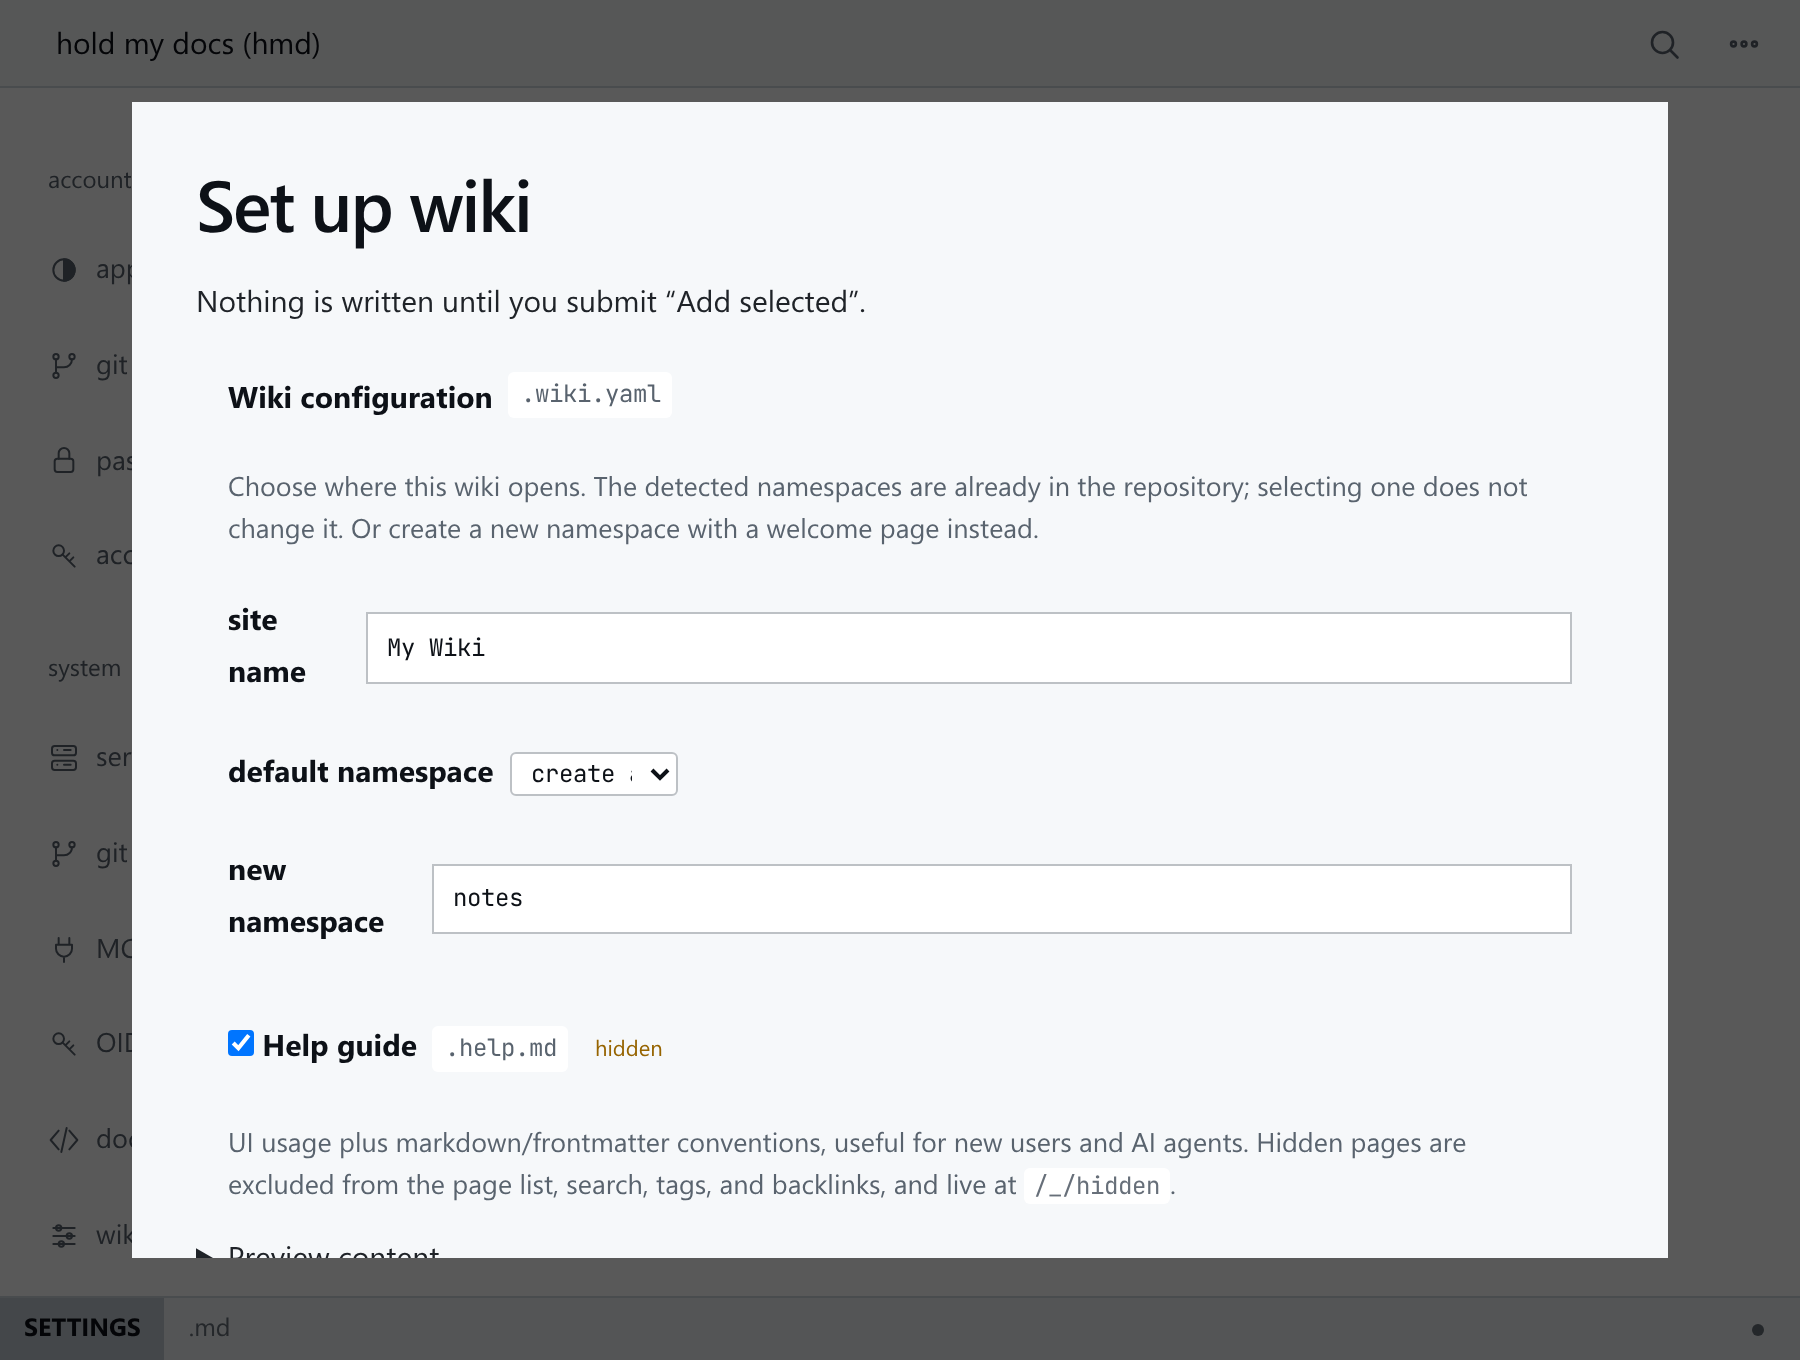
Open your HMD address and sign in with the administrator credentials from installation. On a fresh instance, HMD opens the setup screen.
-
Fill in the fields. Nothing is written until you click Add selected.
Field Example What it controls site name My WikiThe name shown in the top bar default namespace create a new namespace Where the wiki opens after sign-in new namespace notesThe first segment of your page addresses -
Use a short namespace name without spaces or slashes:
notes,teamandhomelabwork;my notesandnotes/inboxdo not. -
Leave Help guide selected on a fresh installation to add an in-app guide. If a guide already exists, selecting it replaces the guide; leave it unchecked to keep yours.
-
Click Add selected, then click
notes/to open its welcome page.
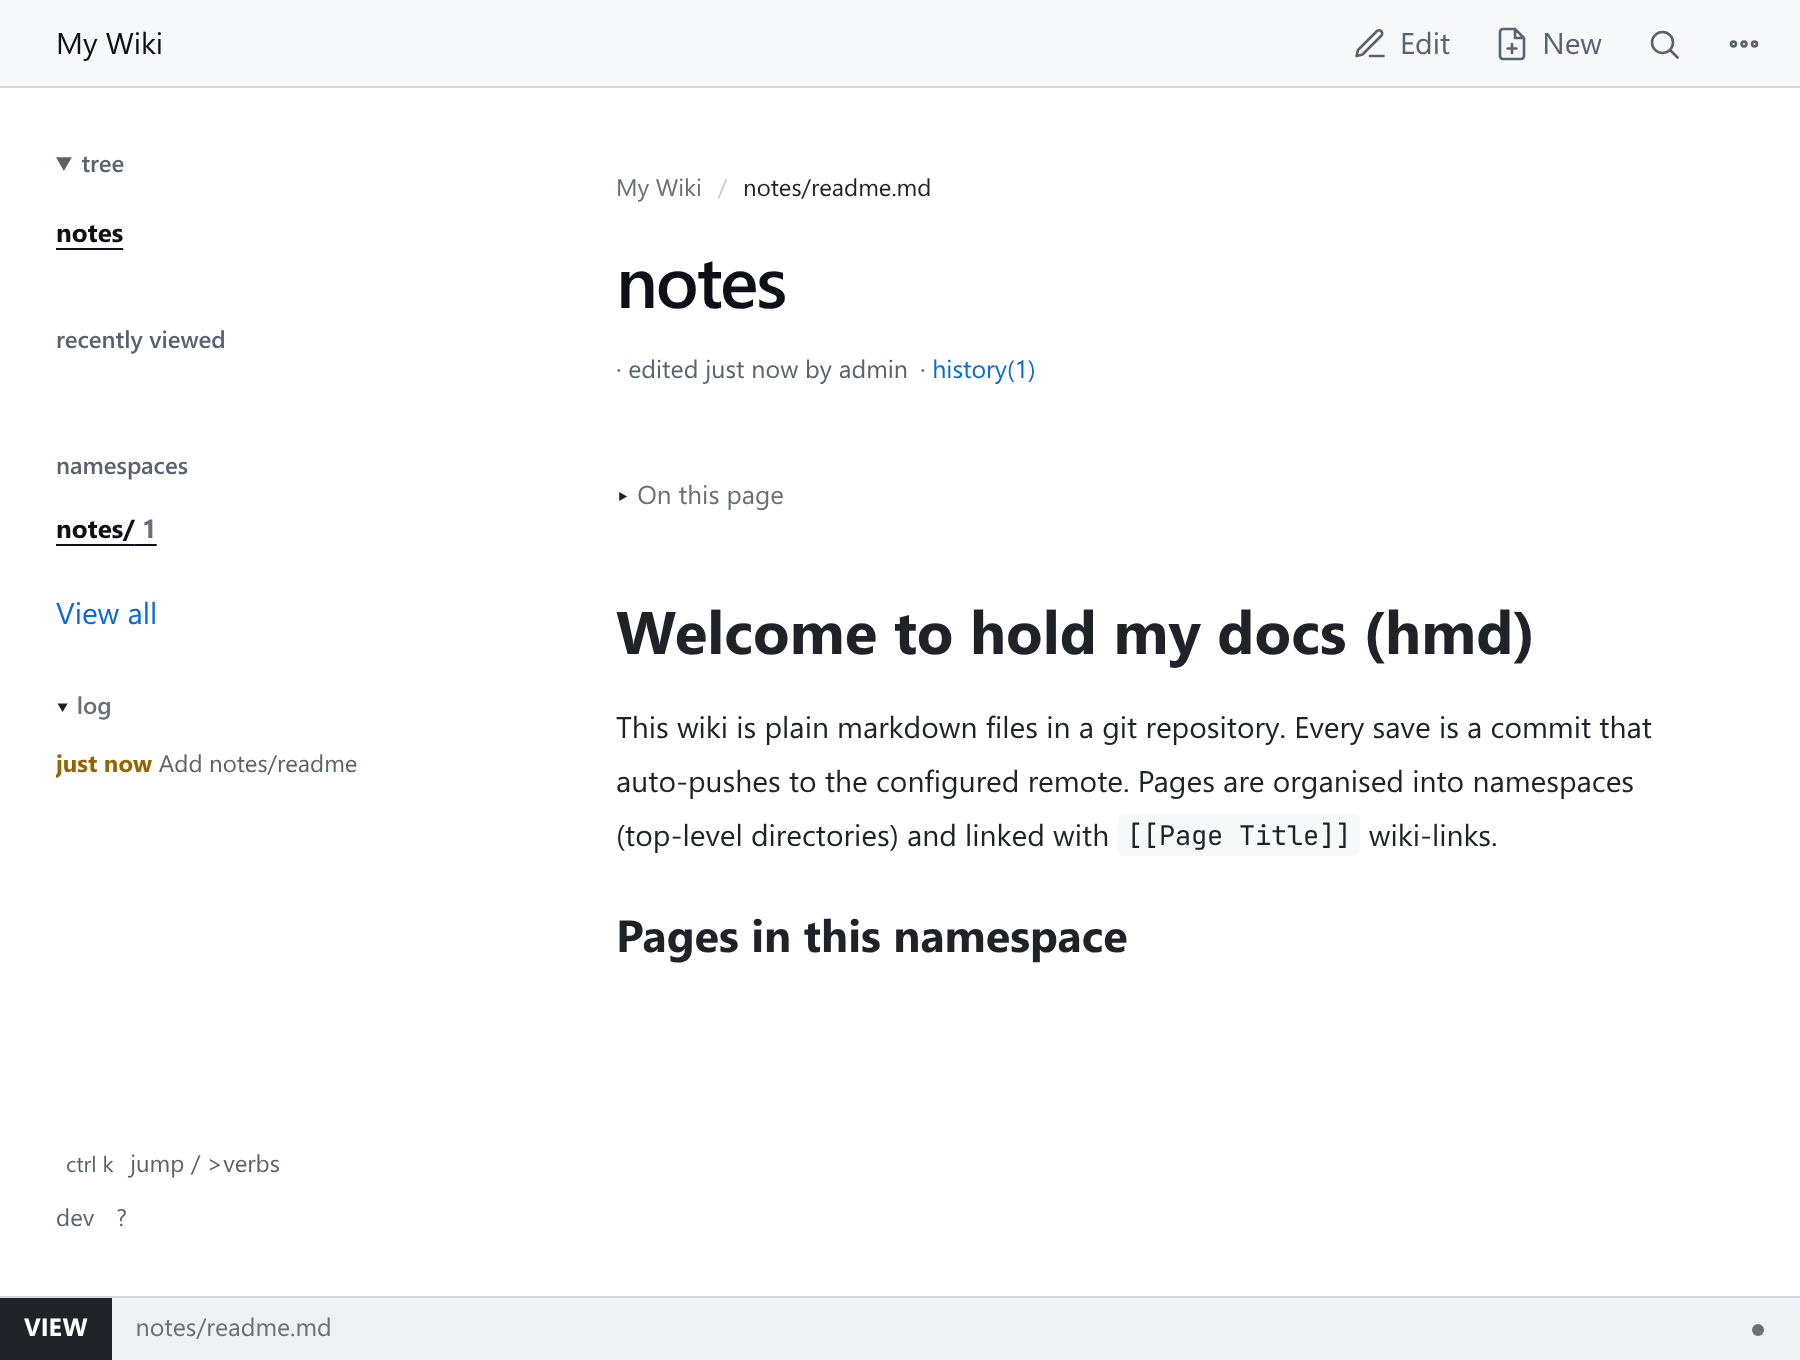
The new namespace is private by default.
If you already have content
The setup screen shows only what is missing: an existing namespace selector, a First namespace option, or only the help guide. Choosing an existing namespace as the default does not replace its pages.
To reopen setup, go to Settings → Wiki at /_/settings/wiki. Skipping setup creates nothing.
Setup writes the site name and the new namespace into the wiki's content, so they travel with your pages if you move them.
Next: Your First Wiki. For the terms used here, see HMD Concepts.